
Create your workspace
Spin up your Stageory workspace — the home for your inventory, projects, and clients. Sign up, set up your profile, then walk the six-step workspace wizard.
- 1
Sign up
Create your account.
- On Create your account, enter your email and a password (at least 8 characters) — or Continue with Google.
- Tick the Terms & Privacy box, complete the I'm not a robot check, then click Create your account.
- Verify your email if prompted.
app.stageory.com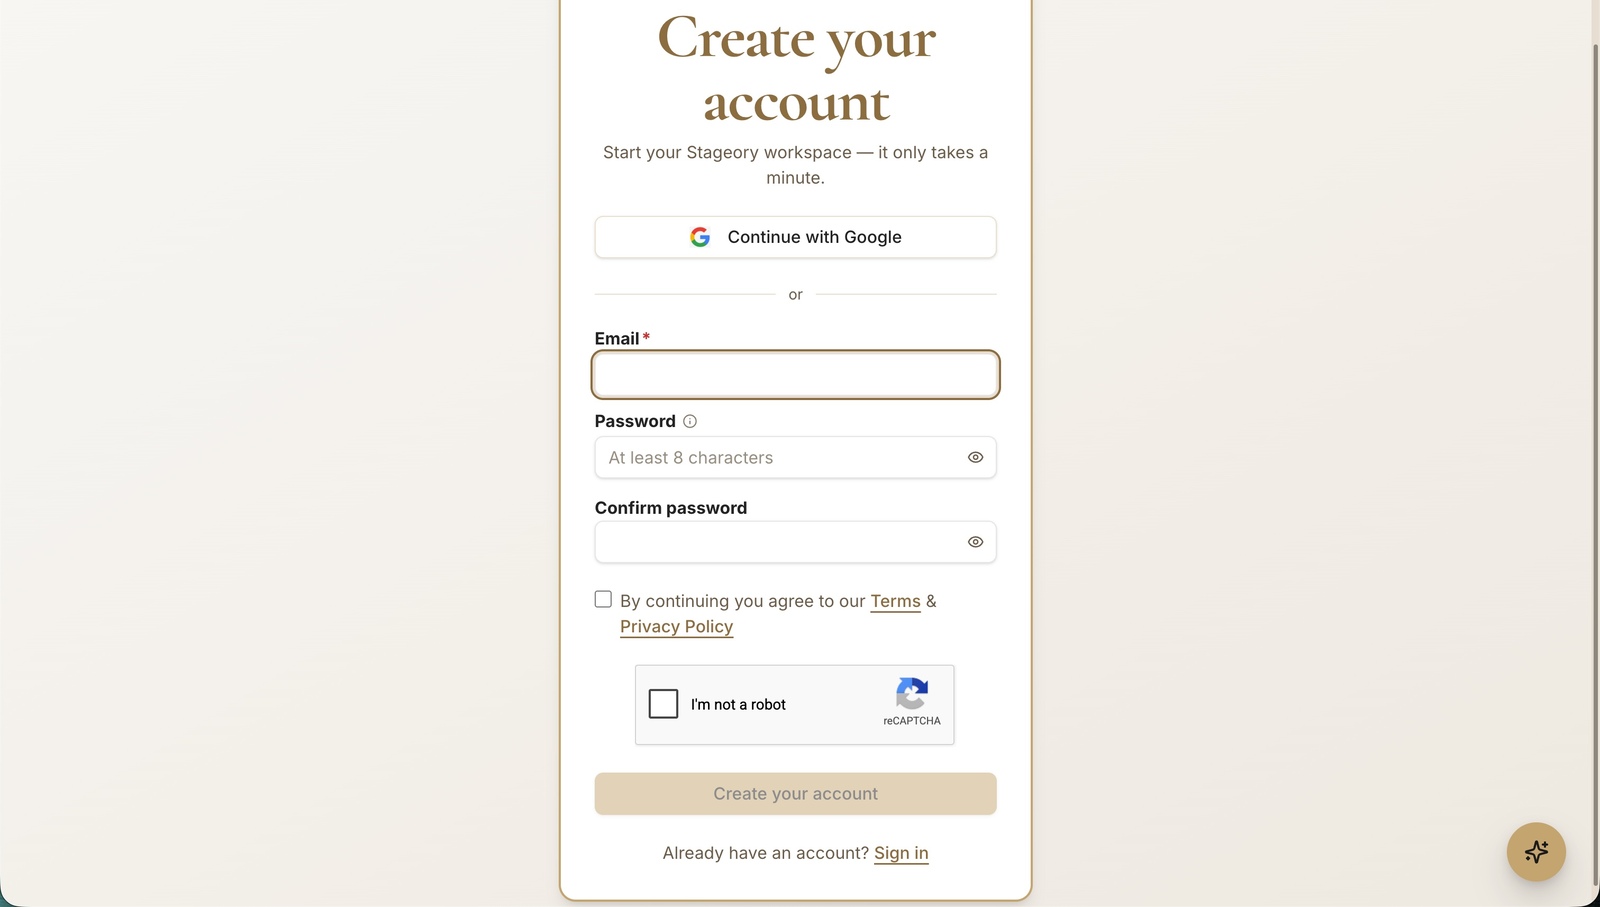
- 2
Start onboarding
Welcome to Stageory.
- Click Get started to set up your profile and workspace — or Skip for now to do it later.
app.stageory.com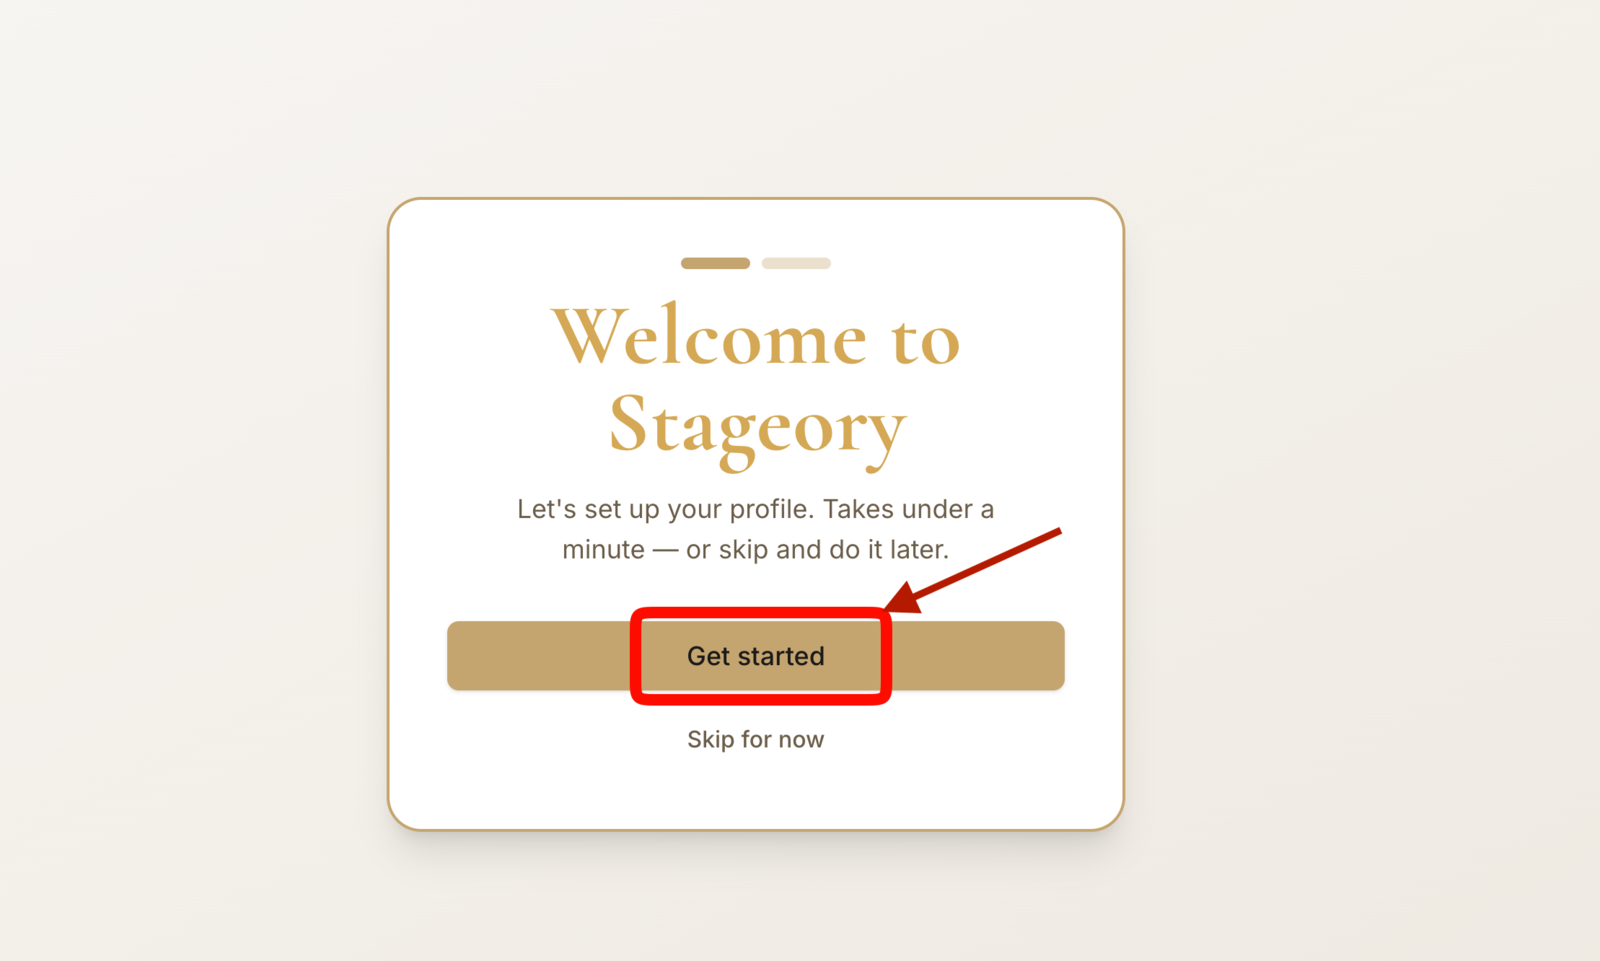
- 3
About you
How you appear to teammates.
- Enter your first and last name; the display name defaults to both but you can edit it.
- Click Save & continue — you can change this anytime in Profile.
app.stageory.com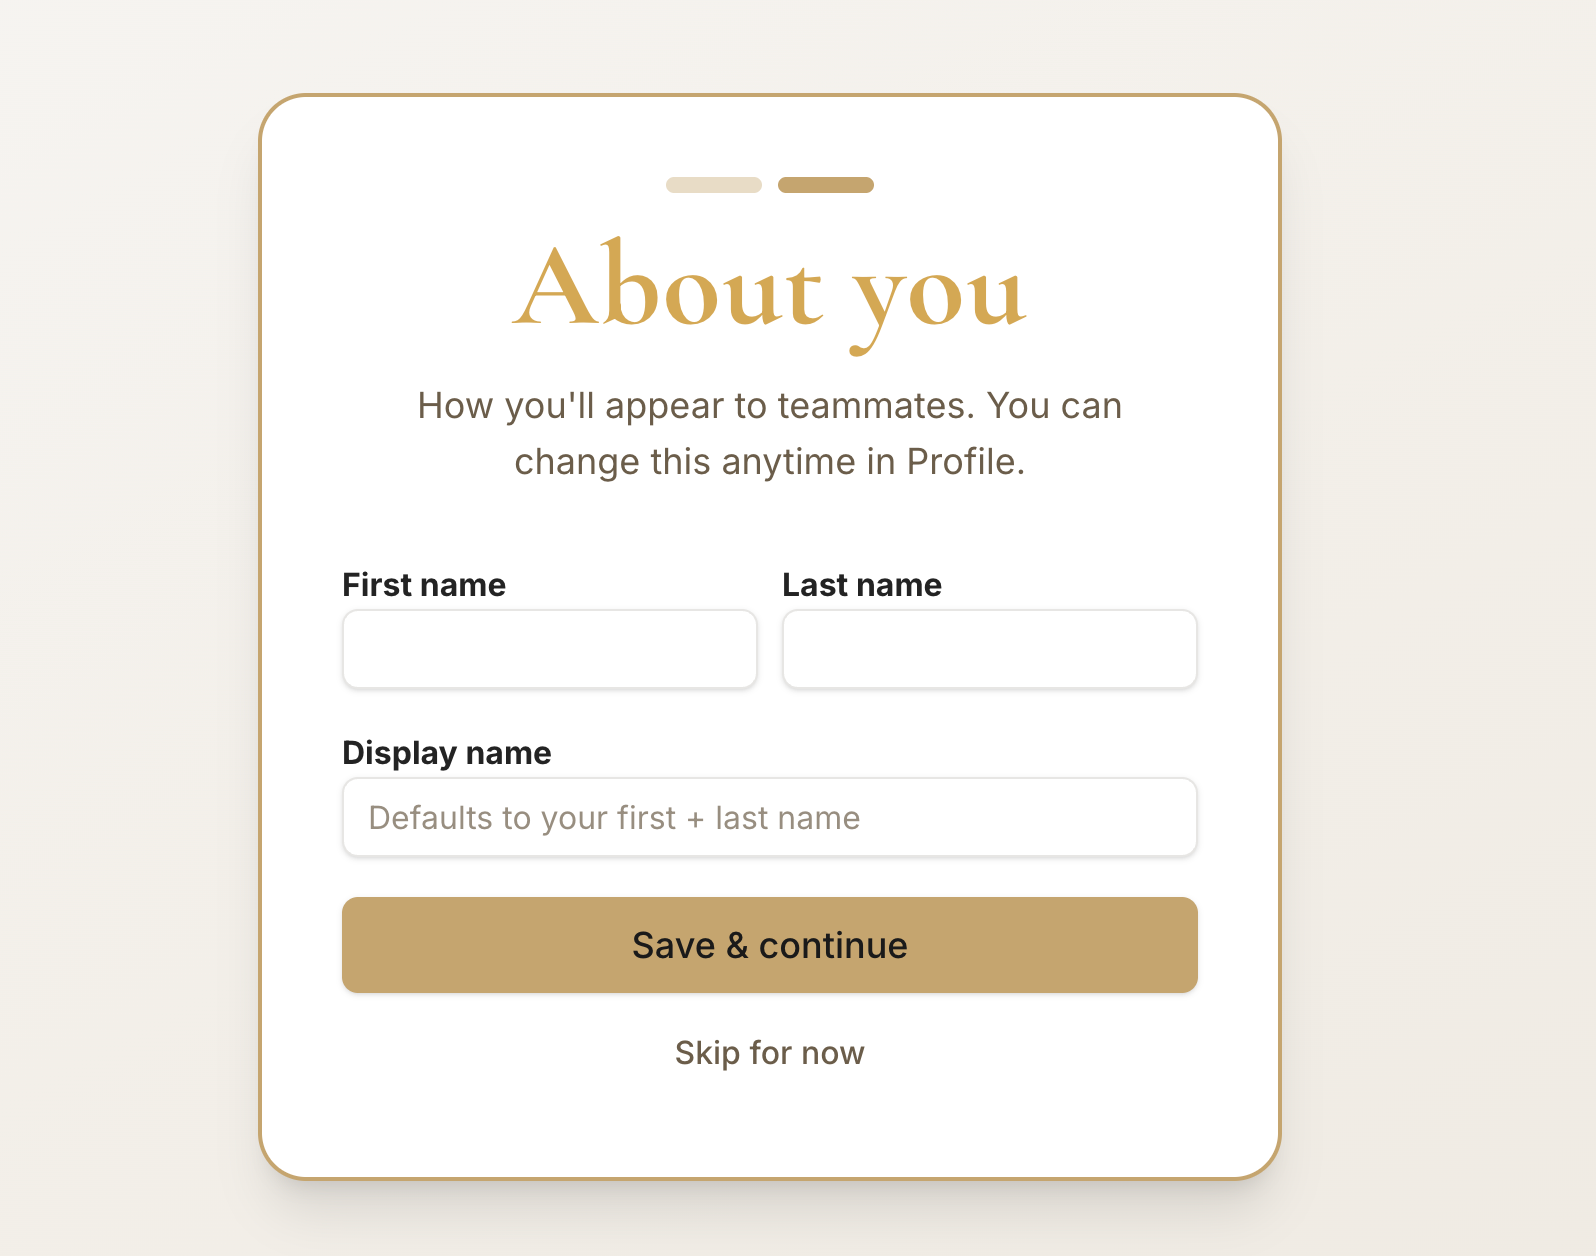
- 4
Workspace details
Step 1 of 6.
- Name your workspace — your team sees this name and it sets a short URL slug.
- Edit the URL namespace if you like (lowercase letters, digits, hyphens); the slug stays even if you rename later.
- Have a launch code? Enter it to extend your free trial, then click Continue.
app.stageory.com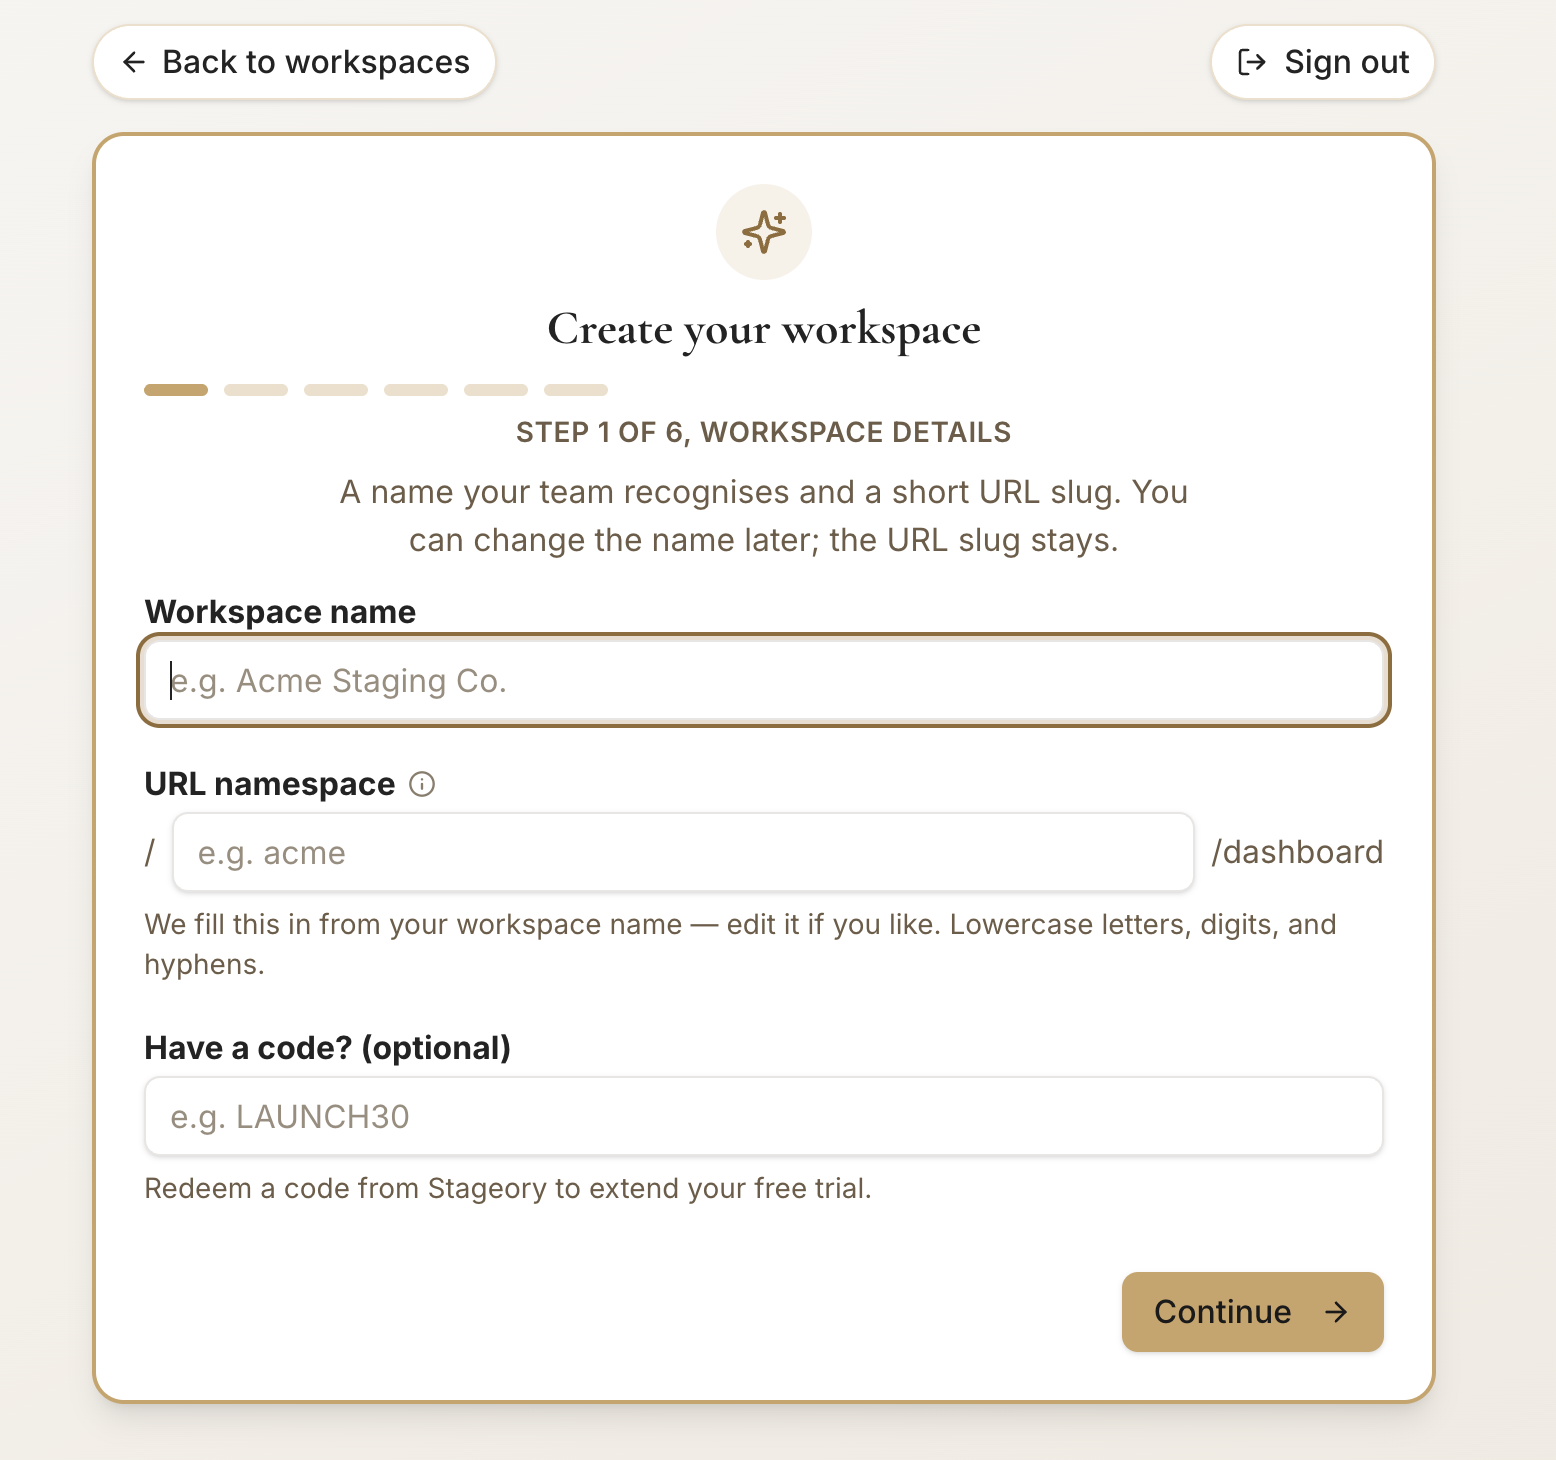
- 5
Profile & branding
Step 2 of 6.
- Set the workspace currency, country, and timezone — all optional; defaults work fine.
- Currency drives money display everywhere; timezone renders dates in this workspace's local time.
- Click Continue.
app.stageory.com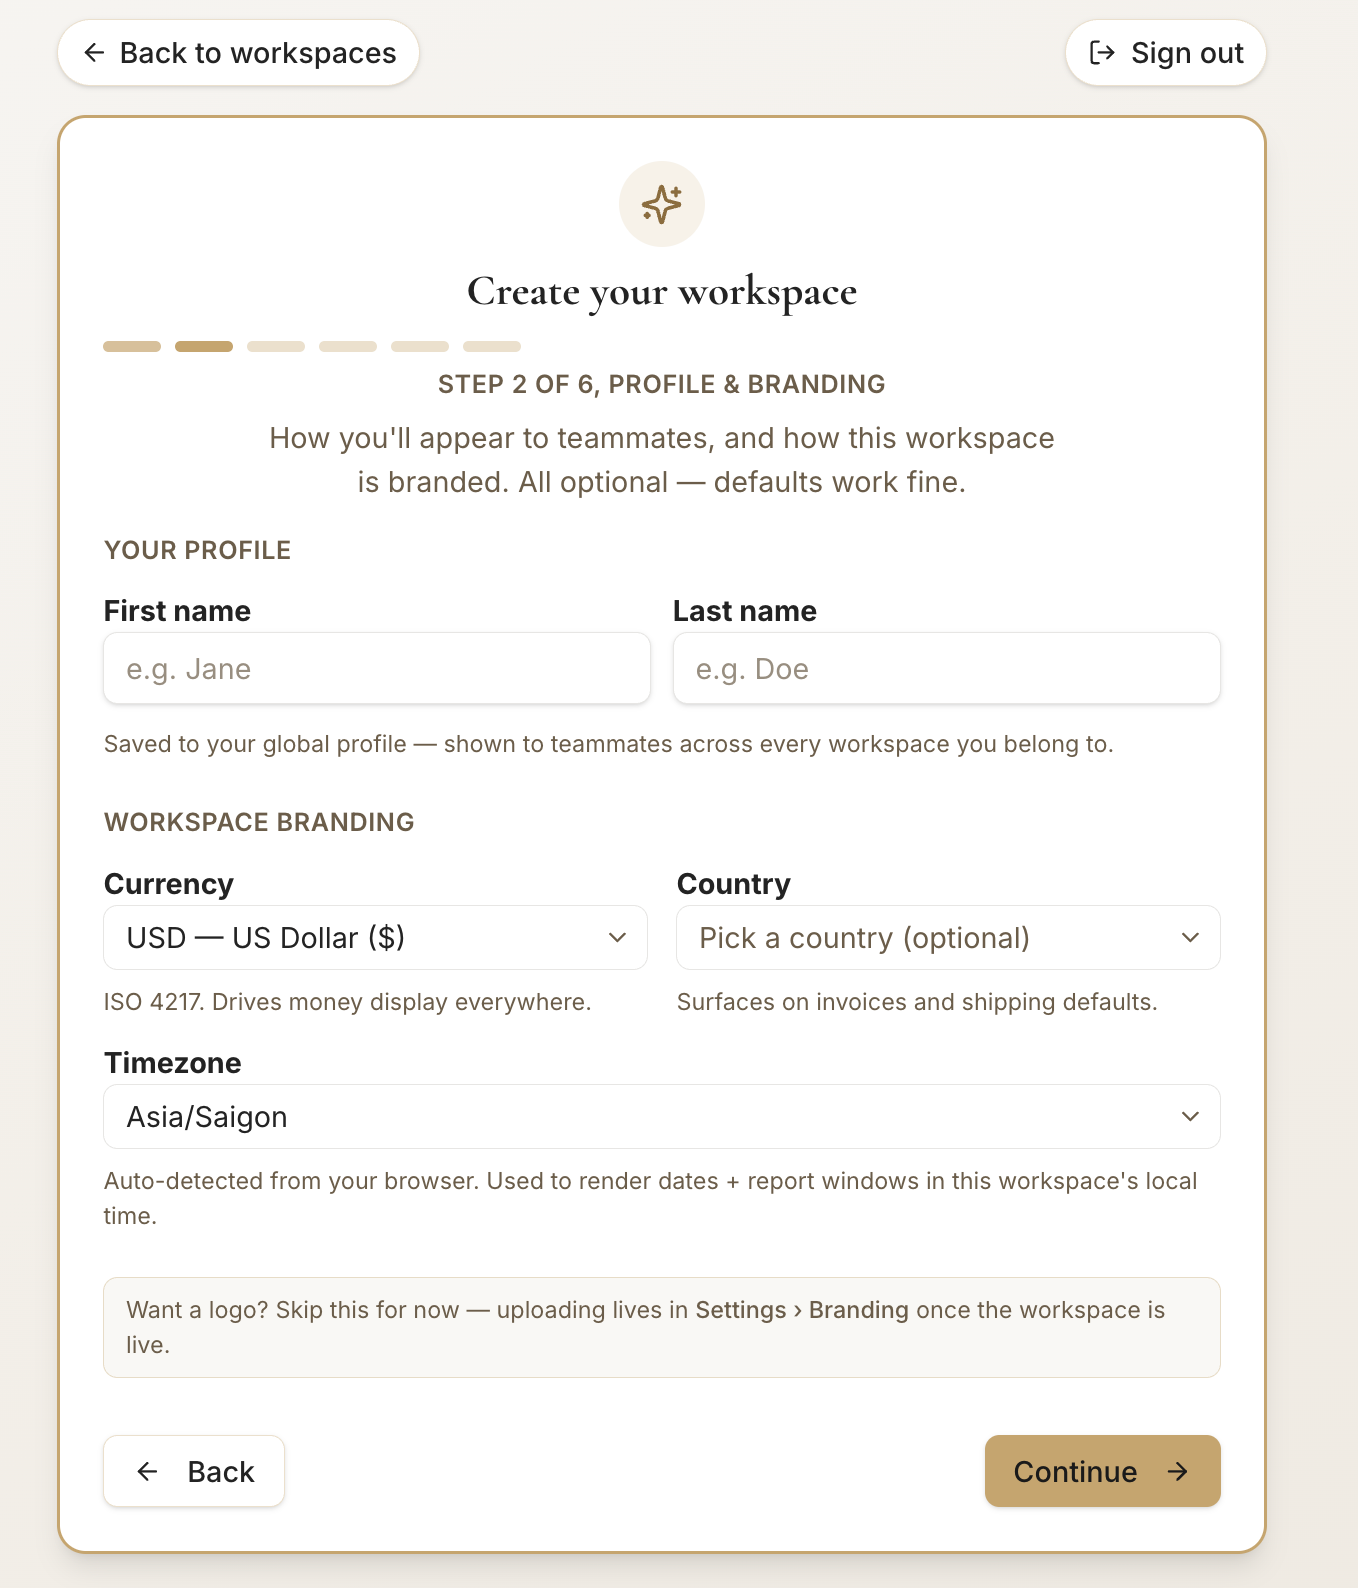
- 6
Headquarters
Step 3 of 6 (optional).
- Optionally add your company address — it biases project-address autocomplete toward nearby locations.
- Click Continue, or Skip for now and add it later in Settings → Branding.
app.stageory.com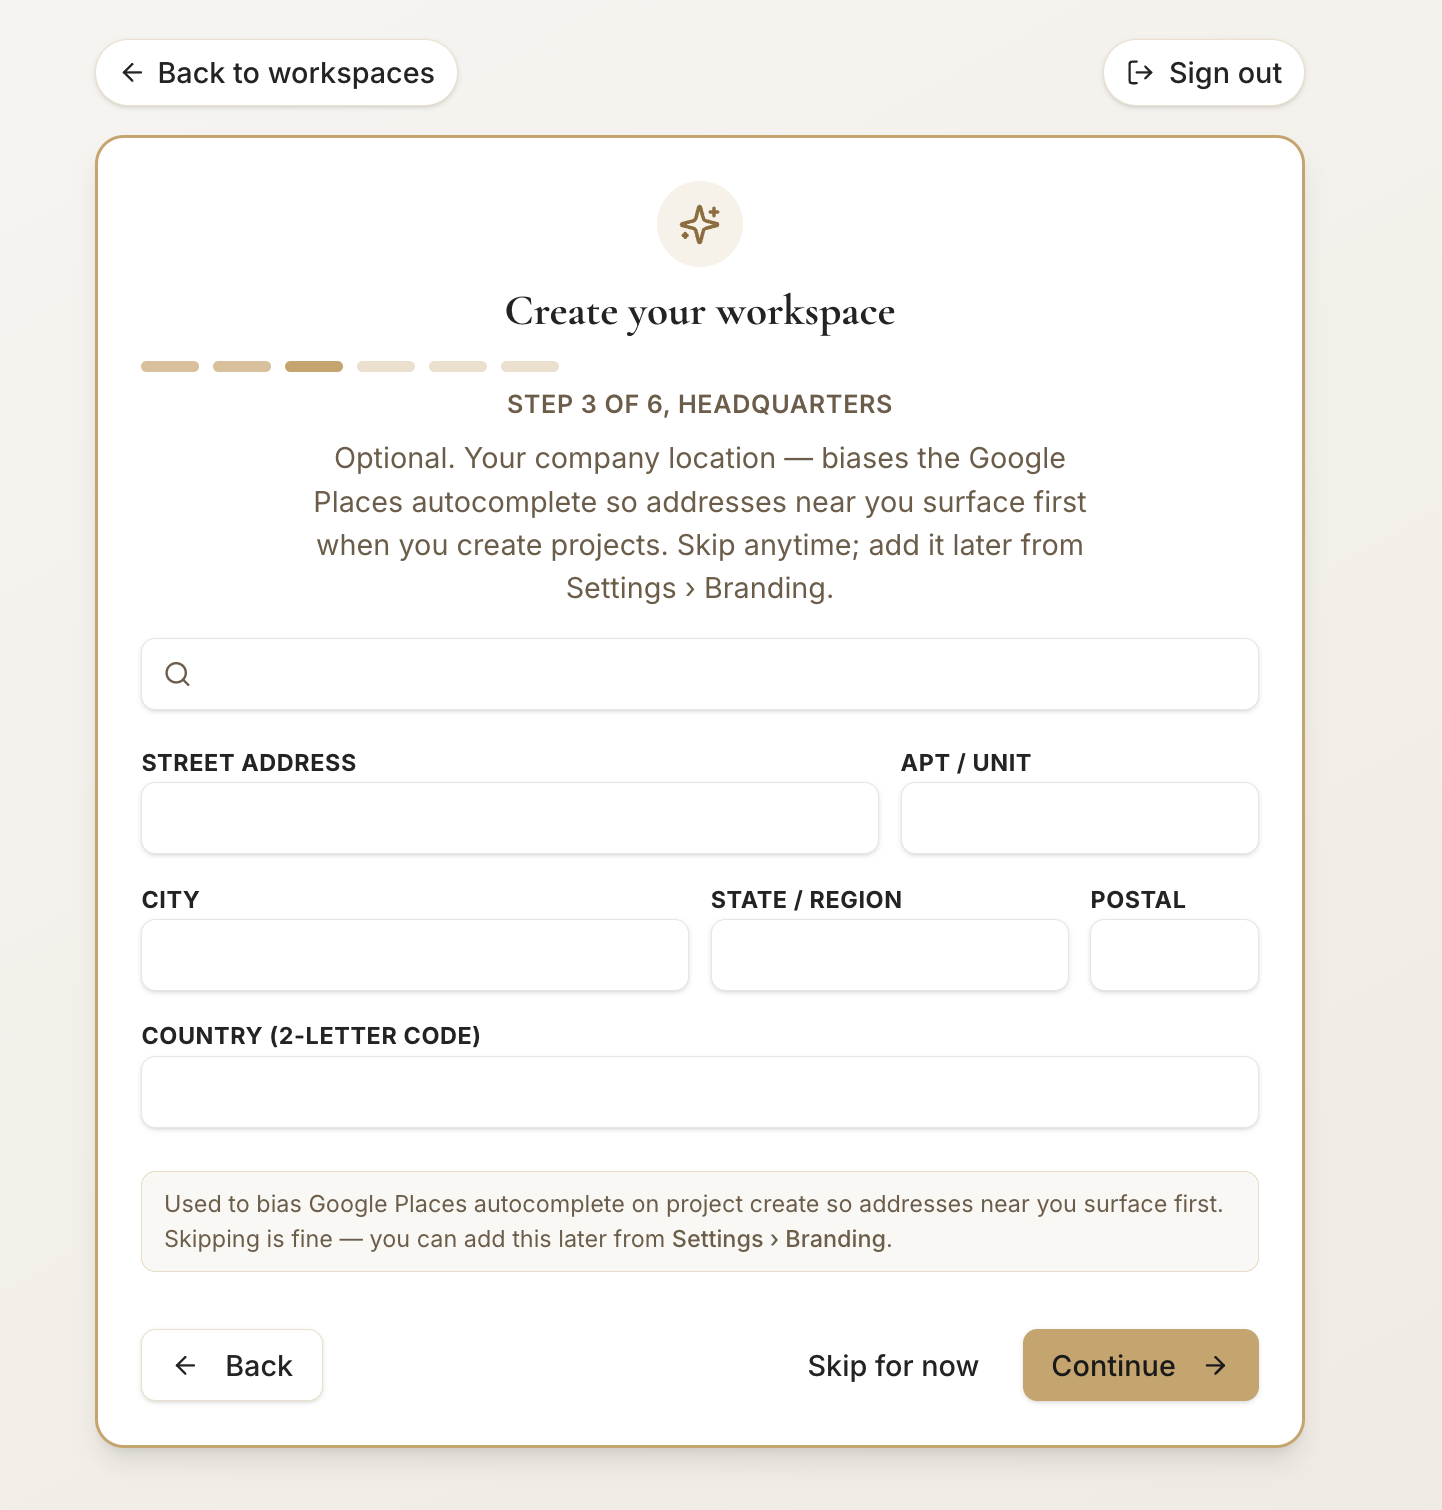
- 7
Default warehouse
Step 4 of 6.
- Name the warehouse your inventory lives in — pre-filled as Main; rename it if you like.
- Click Continue. This becomes the default warehouse, pre-selected whenever you scan or assign inventory.
app.stageory.com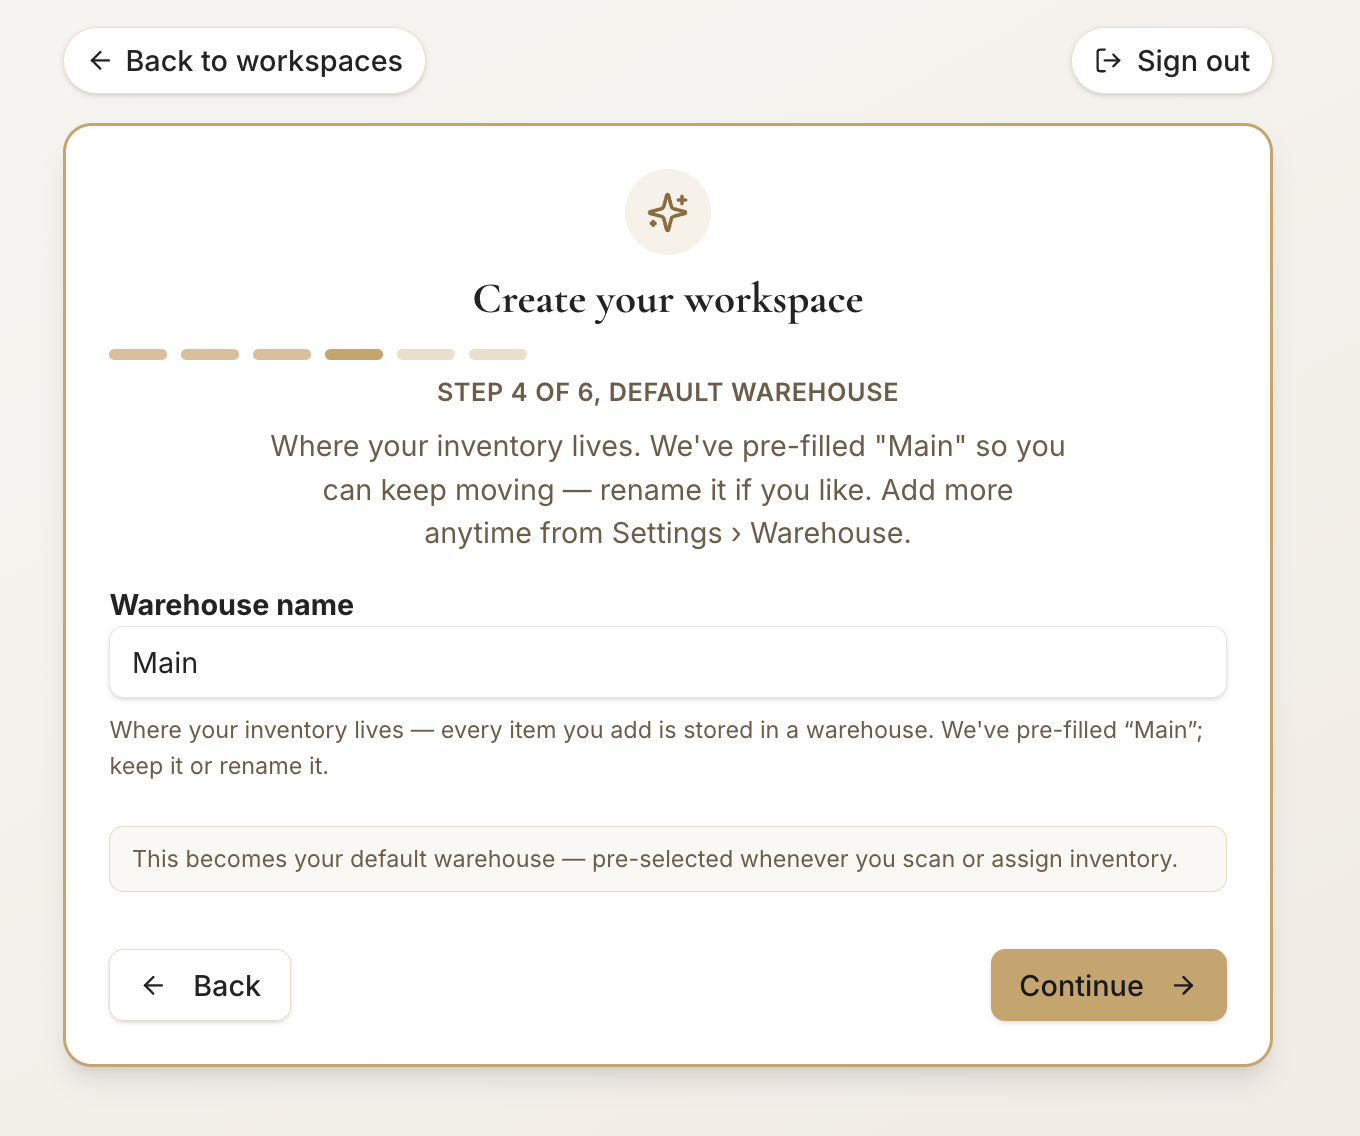
- 8
Sign identity & sender
Step 5 of 6.
- Set the default signer name and email shown on every agreement this workspace sends.
- Click Continue — you can change this later in Settings, and the email must be verified before the first send.
app.stageory.com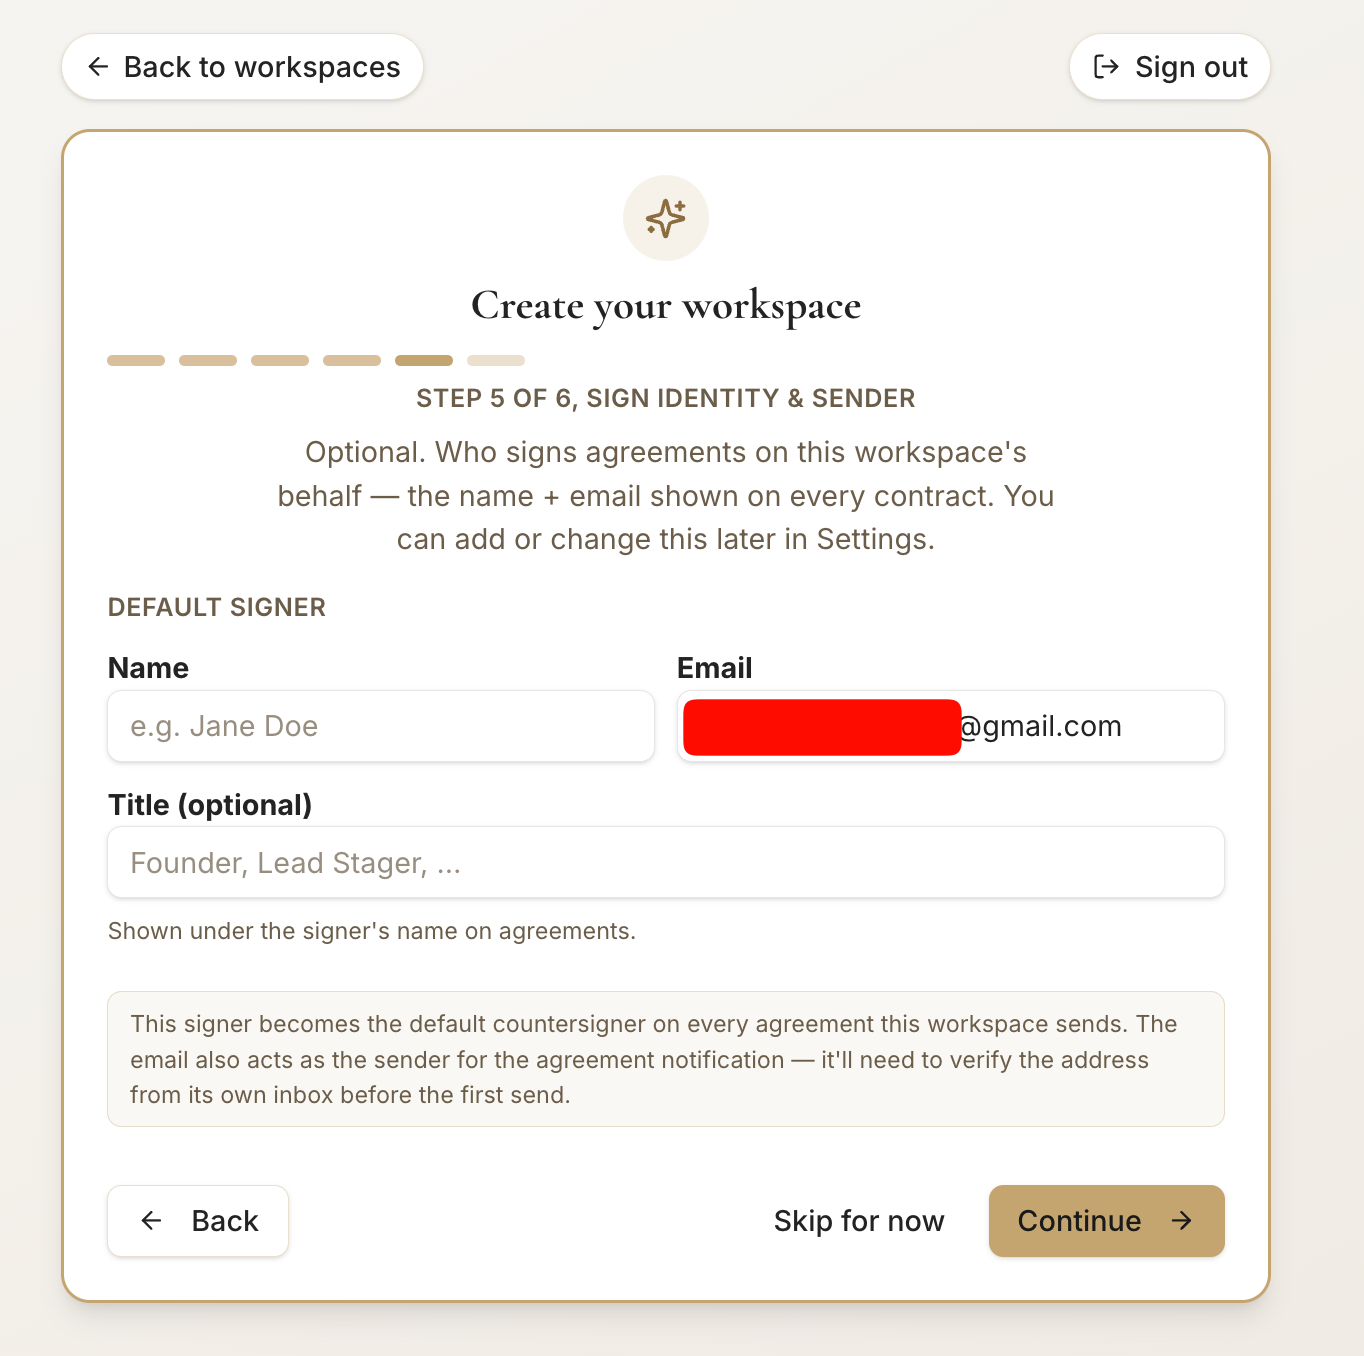
- 9
Pick rooms
Step 6 of 6.
- Choose a preset (e.g. Single-family home) to pre-select common rooms, or toggle individual rooms — add custom ones too.
- Click Create workspace to finish. Rooms stay editable anytime from settings.
app.stageory.com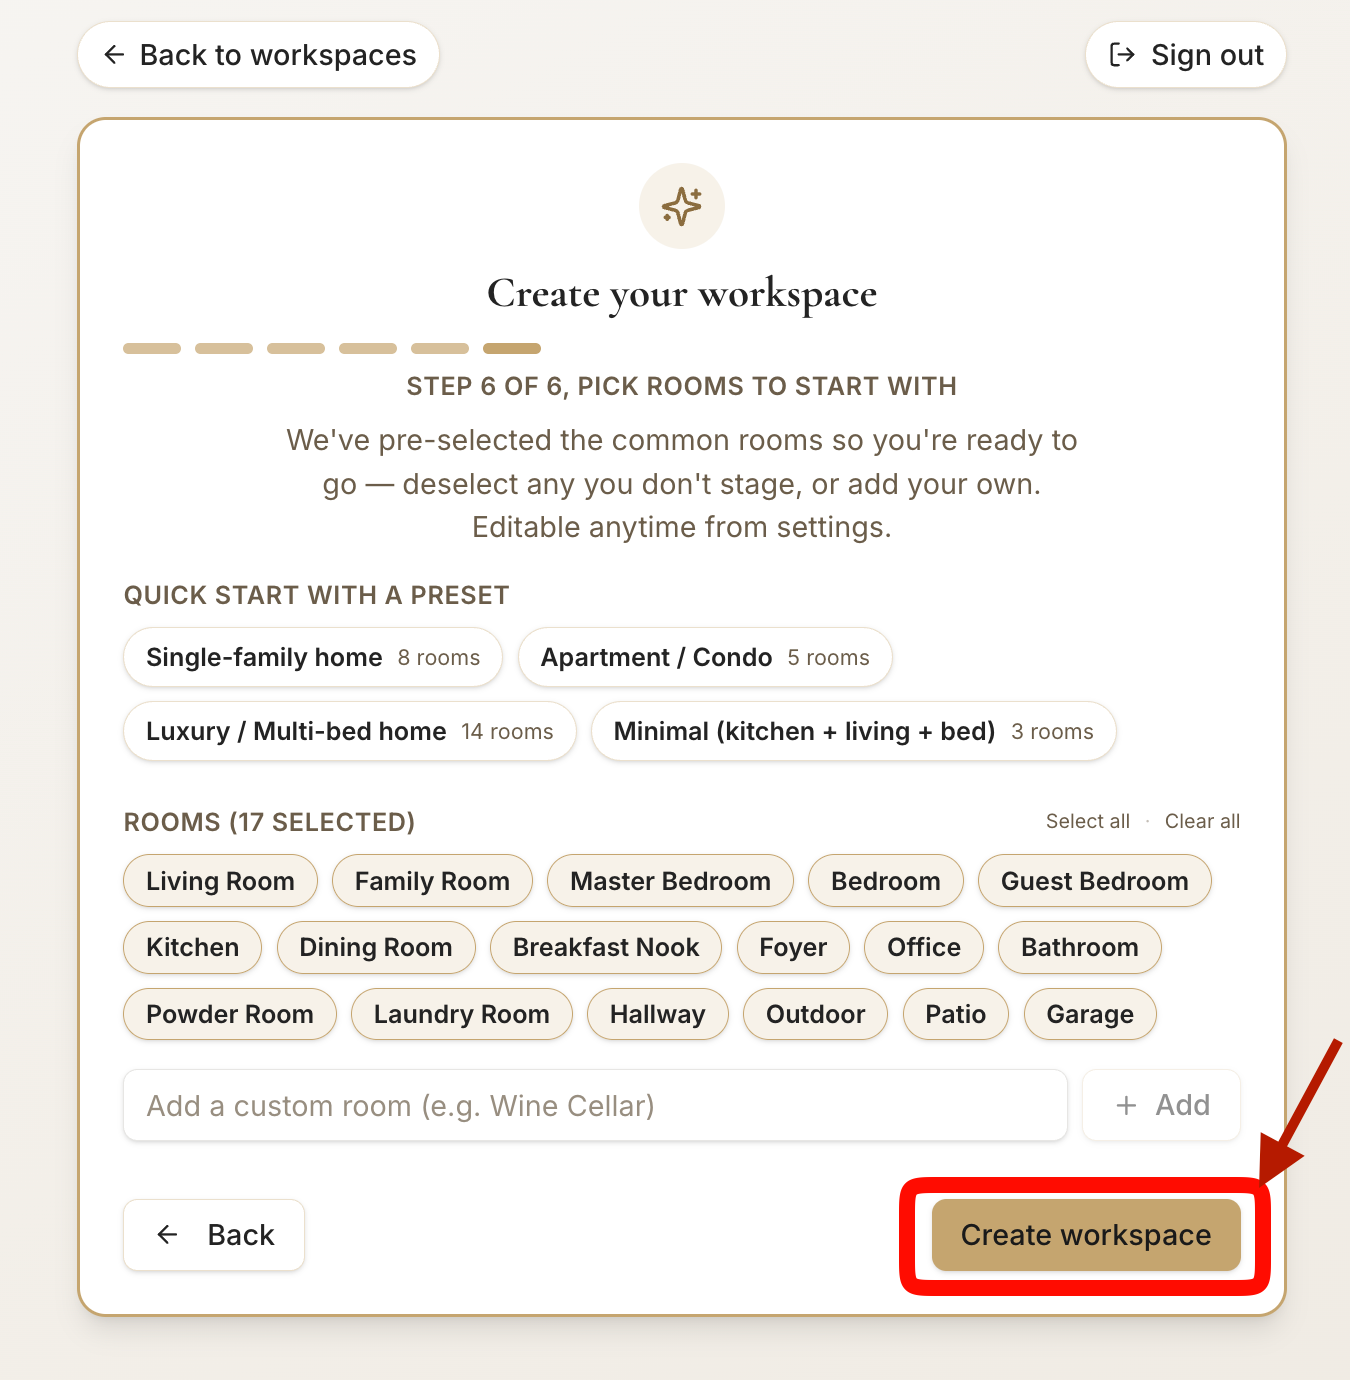
Tips
- You can run more than one workspace from the same login — switch between them from the workspace menu.
- Skipped a step? Everything here is editable later from Settings.
- Invite teammates from Members so they join this same workspace.
Still need help?
Can't find what you're looking for? Our team is here.